Remember Buck, AKA Mr. Curly? C and I are continuing to work on him via email. She is a remarkably clear communicator, so this is working out well for us. She had specific questions, which always makes it easier to offer instructions.
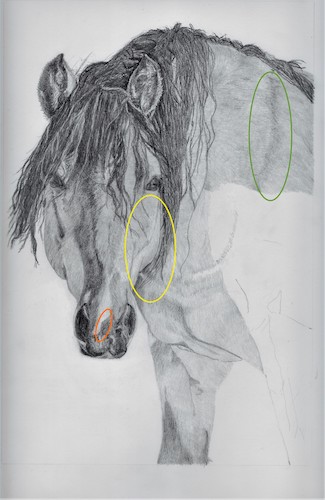
This is how he looked when we last saw him. I sent her written instructions that corresponded to each colored oval.
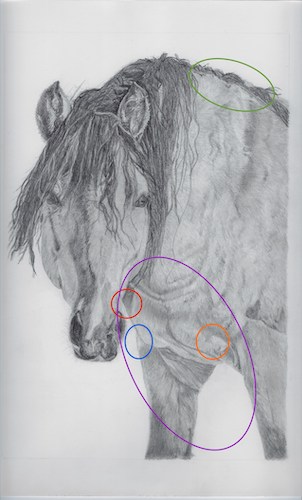
This is the most recent iteration of Buck, complete with more colored ovals.
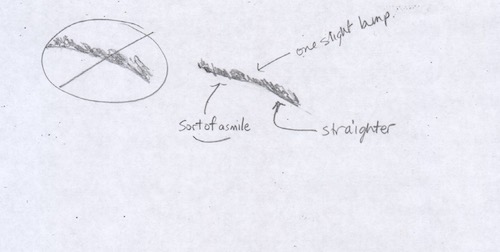
1. The upper neck/mane: You were right about this area. (She had circled it, said it looked wrong and asked about a particular fix.) If you study this area on the drawing versus the photo (I recommend upside down), you will see that the mane sort of curves downward into the neck. Hmmm, words aren’t working. Let me show you.

2. My blue circle: At the intersection of the leg and chest, that slight corner needs to be higher. Look at the photo to see EXACTLY where it lines up with the nostril. Essentially, you will be lengthening the leg by making that intersection a bit higher. Look at it all upside down to re-examine the shape between the face and chest. (A tiny thing that might not matter, but I am scratching around, looking for answers).
3. Red circle: study the photo to see where the nostril/cheek indentation and the neck intersect. (Another tiny thing that might not matter but try it just in case. . . )
4. Purple circle: All of this area needs to be much darker with the segments less defined because they are in shadow. The exception – keep this little bump light.
Does this all sound like gobbledygook to you? Good thing C and I have been working together for a couple of years, because it does make sense to her.