New Virtual Drawing Lesson #2

Last week we saw the beginnings of C’s new horse drawing.

The eyes are the best place to start when drawing a living being. The eyes on Mr. Curly were too dark to see on the photo, so I used the computer to lighten and enlarge. (If you can’t see a thing, it’s almost impossible to draw the thing. Duh. You are welcome.)

Eye on the left after enlarging and lightening:

Eye on the right, after lightening and enlarging:

My demonstrations and notes, scanned a little darker than accurate in order for C to be able to read my handwriting, which makes the drawing parts a little too dark. There are many drawbacks to this virtual stuff, but C is a very committed drawing student and an excellent communicator.

I wonder how many of you will unsubscribe to my blog because this type of post is making your eyes cross.

New Virtual Drawing Lesson

Look at this beautiful photo of a horse by my drawing student C. She wants to draw it and I will do my best to help her, through emails.

The first set of instructions was this:

  1. Trace the main parts to simplify the visual information
  2. Copy the tracing onto the drawing paper, rotating directions. Start upside down, then sideways, next other sideways, finally right side up. Each direction will show you different shapes and angles that need to be corrected.
  3. Trace a few more details onto the first tracing.
  4. Add those details to the drawing, remembering to rotate.

This is what C sent to me after finishing those actions.

She is drawing the same size as her printed photo. This means she can scoot the tracing over the top of her drawing to check her accuracy. 

When students draw the exact same size as their photo, they can do this sort of checking. Here are some thoughts about that:

  1. Always force yourself to draw first, BEFORE laying the tracing on top. We all need to exercise our “seeing muscles”, and practice is the only way to learn to see accurately.
  2. When you draw the same size as your photo, you aren’t learning to see proportionately as quickly as if you draw larger or smaller. Sure, you will still have to see how things relate to one another inside the drawing, but you aren’t looking at the whole to learn to think thoughts such as “half is always half” or “a third on my drawing needs to be the same as a third on the photo”.
  3. When you draw the same size as your photo, sometimes you get paralyzed by the thought of changing size.
  4. If you are dependent on drawing the same size as your photo, it is even harder to transition into drawing from real life. Drawing from real life is the hardest way to draw, because you are going from 3 dimensions to 2 dimensions, and every time you slouch a bit or accidentally lean to one side or the other, the image in front of you changes.

Stay tuned. The virtual drawing lesson will continue.


Virtual Drawing Lesson 5

Virtual Drawing Student C finished her drawing of the horse, Rocky. She sent me a new photo that I named Mr. Curly, and I have instructed her how to begin.
About starting Mr. Curly:
1. First step is always to decide how big and where on your paper that Mr. Curly will go.
2. Remember to draw a border so that you don’t view the edge of the paper as the edge of your drawing. Margins are necessary for many reasons.
3. Do you have tissue paper so you can trace the main shapes? The purpose of this is to simplify the image in order to get the bare bones laid out on your new paper.
4. If you don’t have tissue paper, you can skip that step. It is a little harder to see the main shapes with all those colors and textures than if you are looking at just an outline on tissue.
5. Remember to look at the drawing (and the tracing or the photo) upside down, sideways, other sideways, and then finally right side up. 
6. Go slowly, draw light, and don’t stop until all the shapes look perfect. Okay, you can stop if you need a break or feel stuck, but don’t begin shading until you have all the outlines down. Remember to draw the dog before you draw the fleas.
7. After it looks perfect, scan and send it to me so I can see if there are any problems with the proportions.
 
P.S. Maybe Mr. Shaggy or just Shaggy would be a more appropriate name. Or how about Lurch?

Virtual Drawing Lesson Thoughts

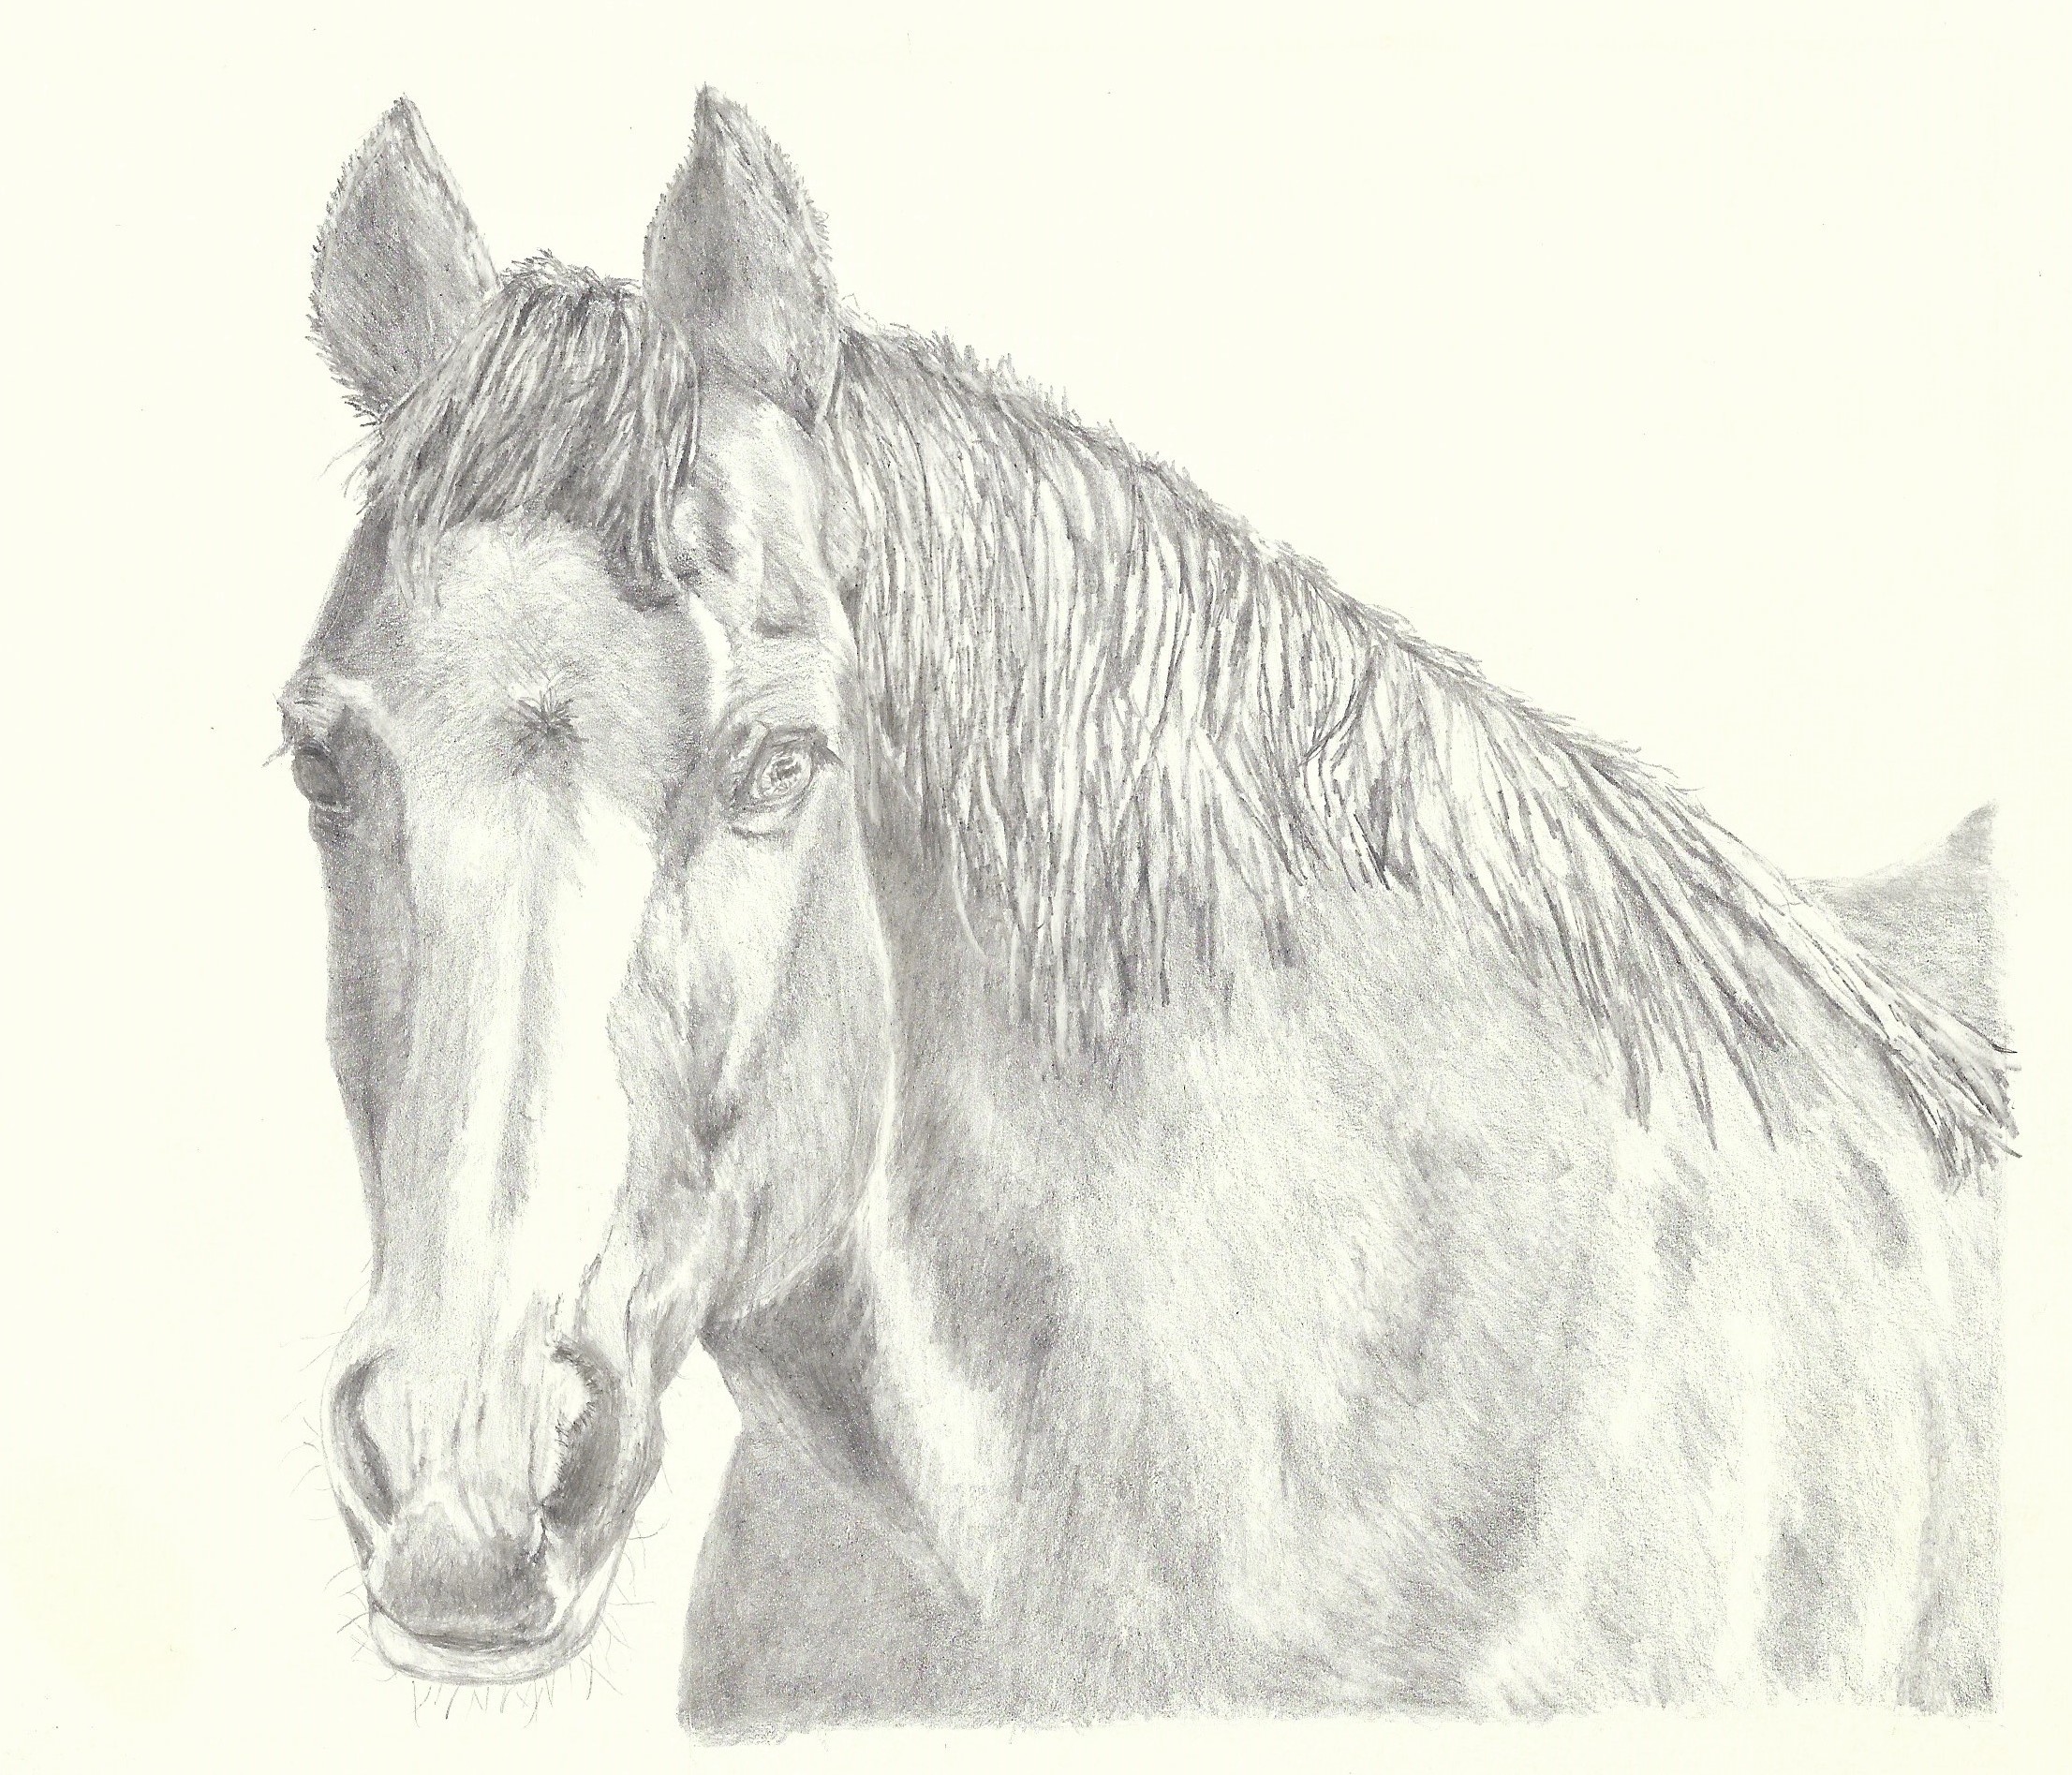
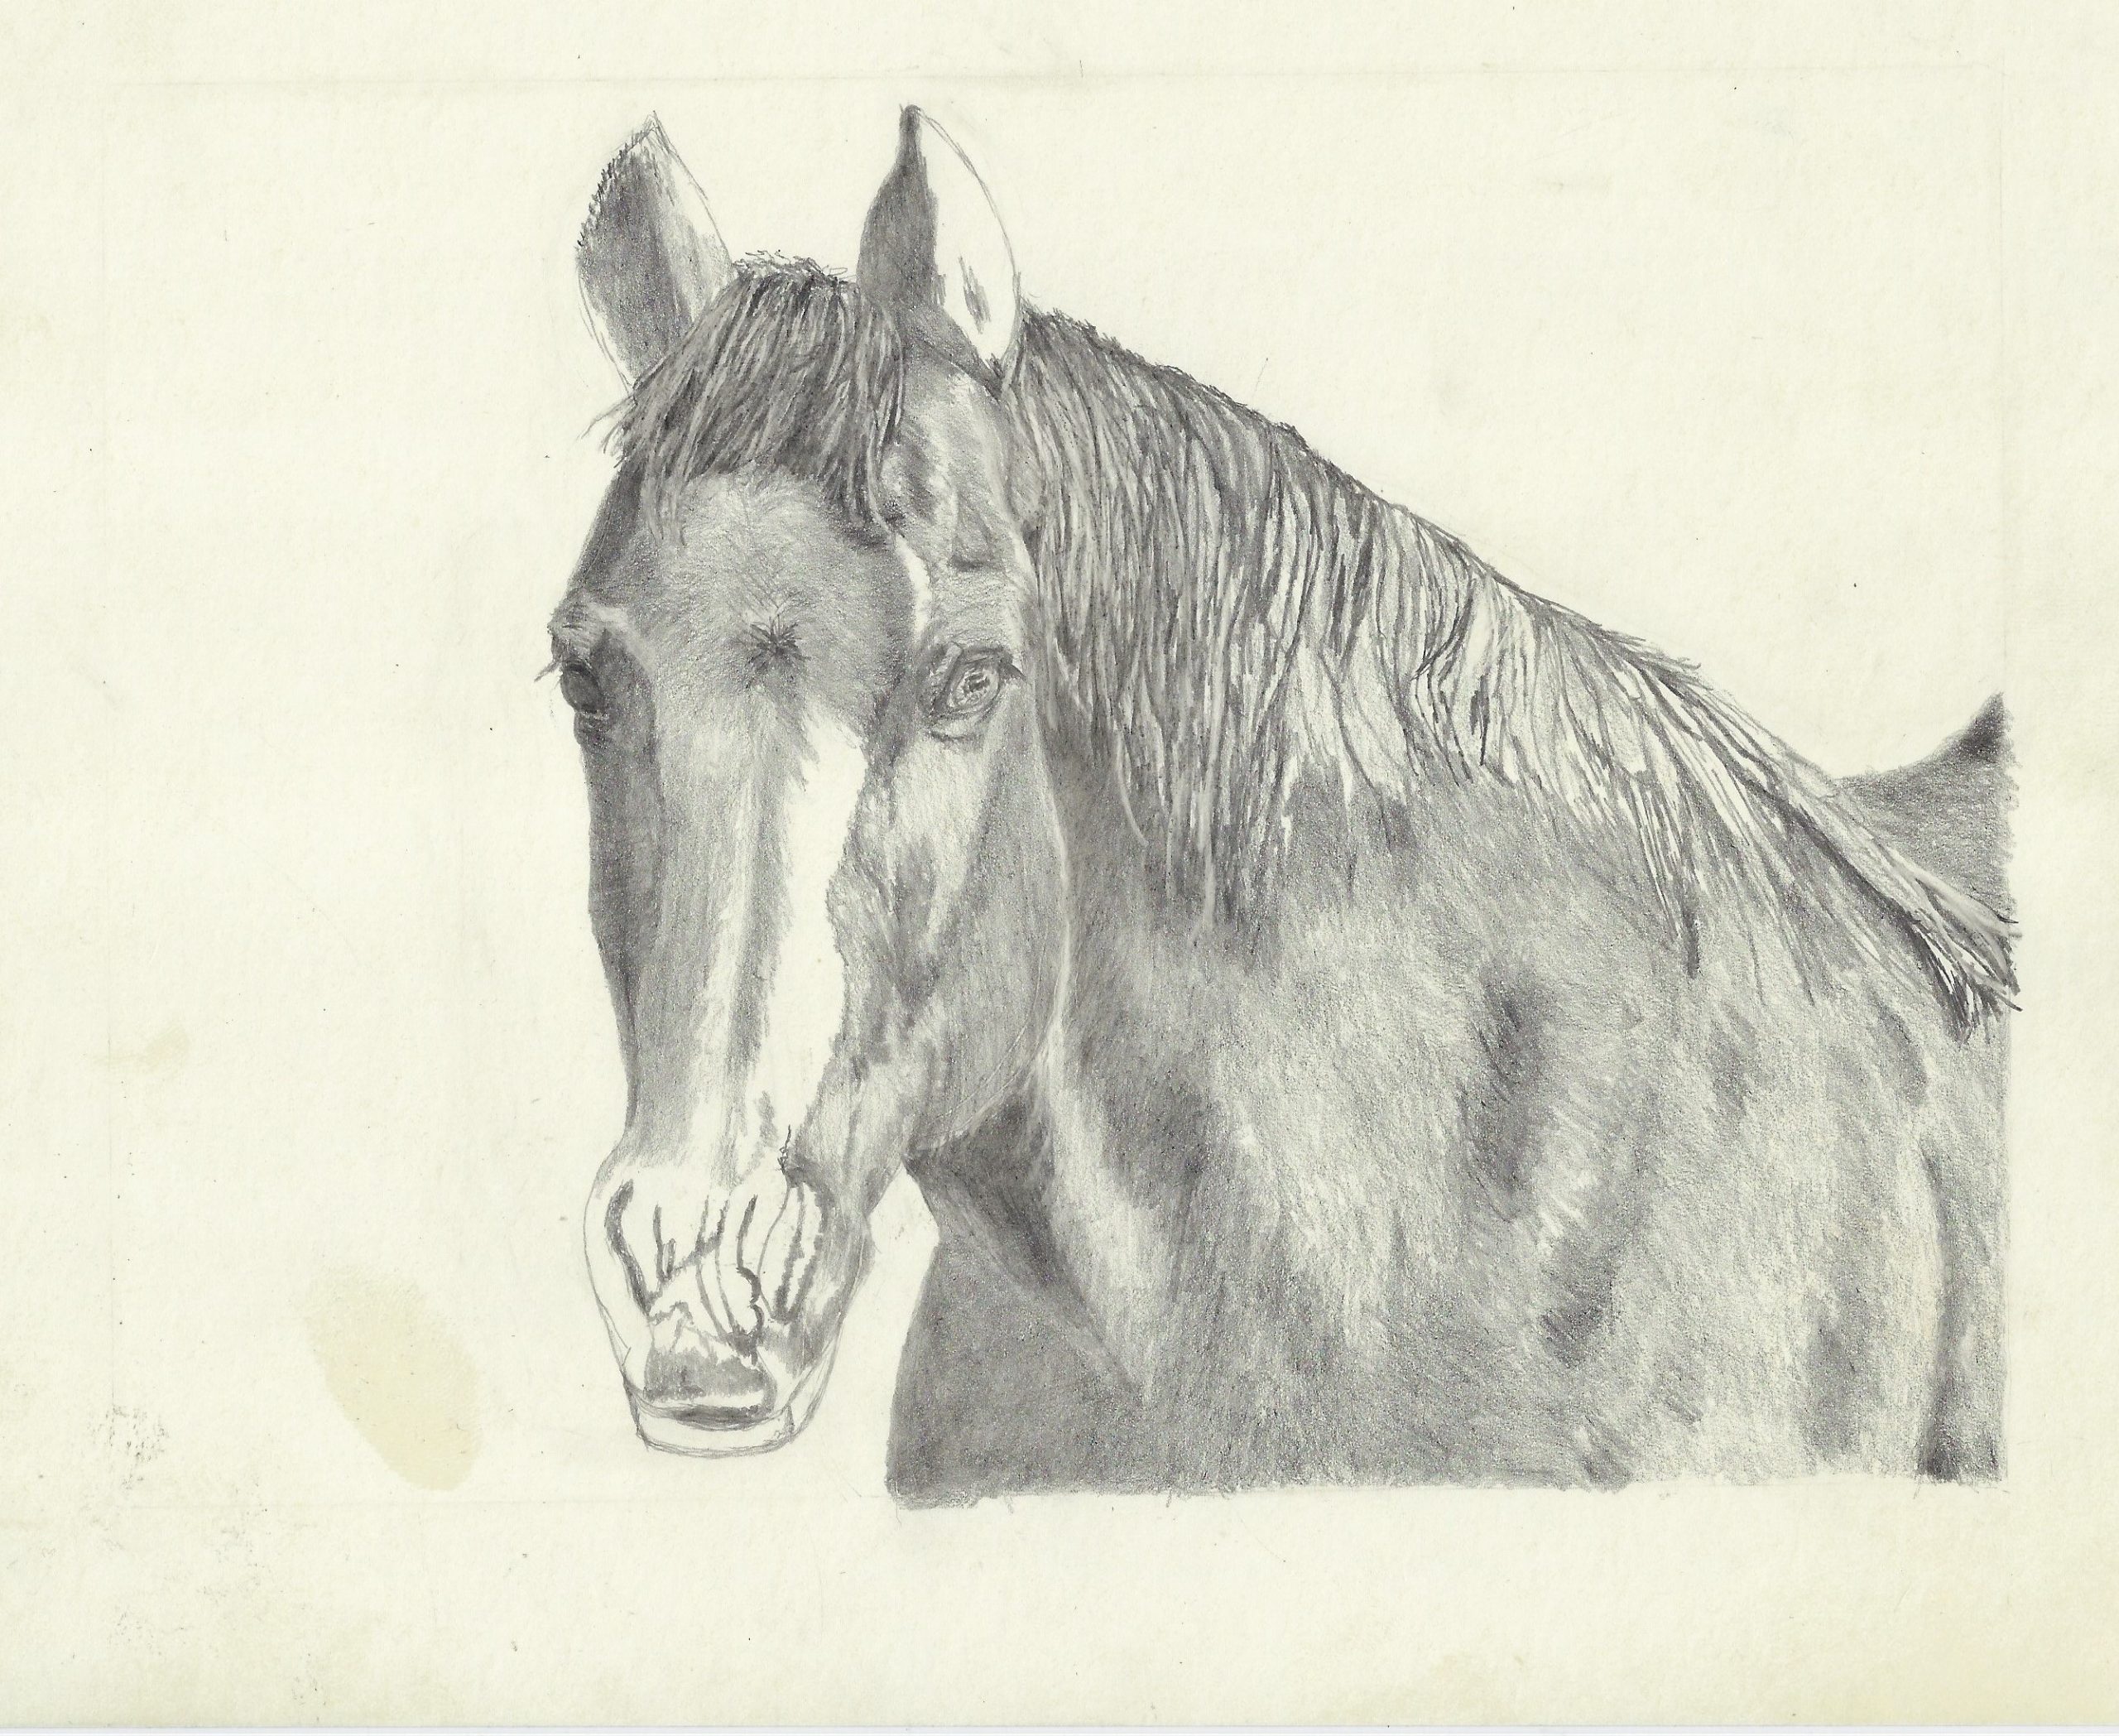
In working with my drawing student C via email, we discussed the fact that the drawing of her horse Rocky got finished in record time for her. She is such a good thinker and clear communicator that I decided to share what we discussed. These are her conclusions about finishing quickly and my thoughts.
C’s drawing table is where she can work any time she passes by without having to set things up.
It is so helpful to have an art project be accessible so it isn’t a project unto itself just to set up. 
C felt dependent on my help when in class and a little intimidated to just dive on in.
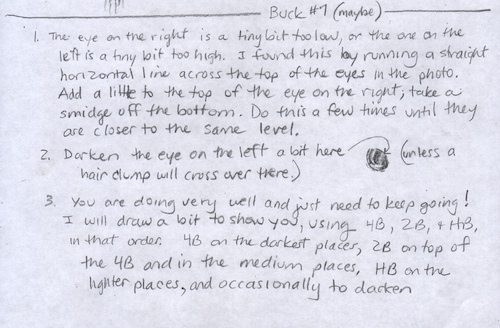
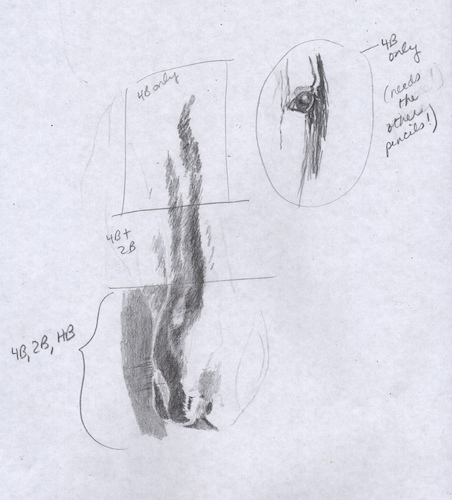
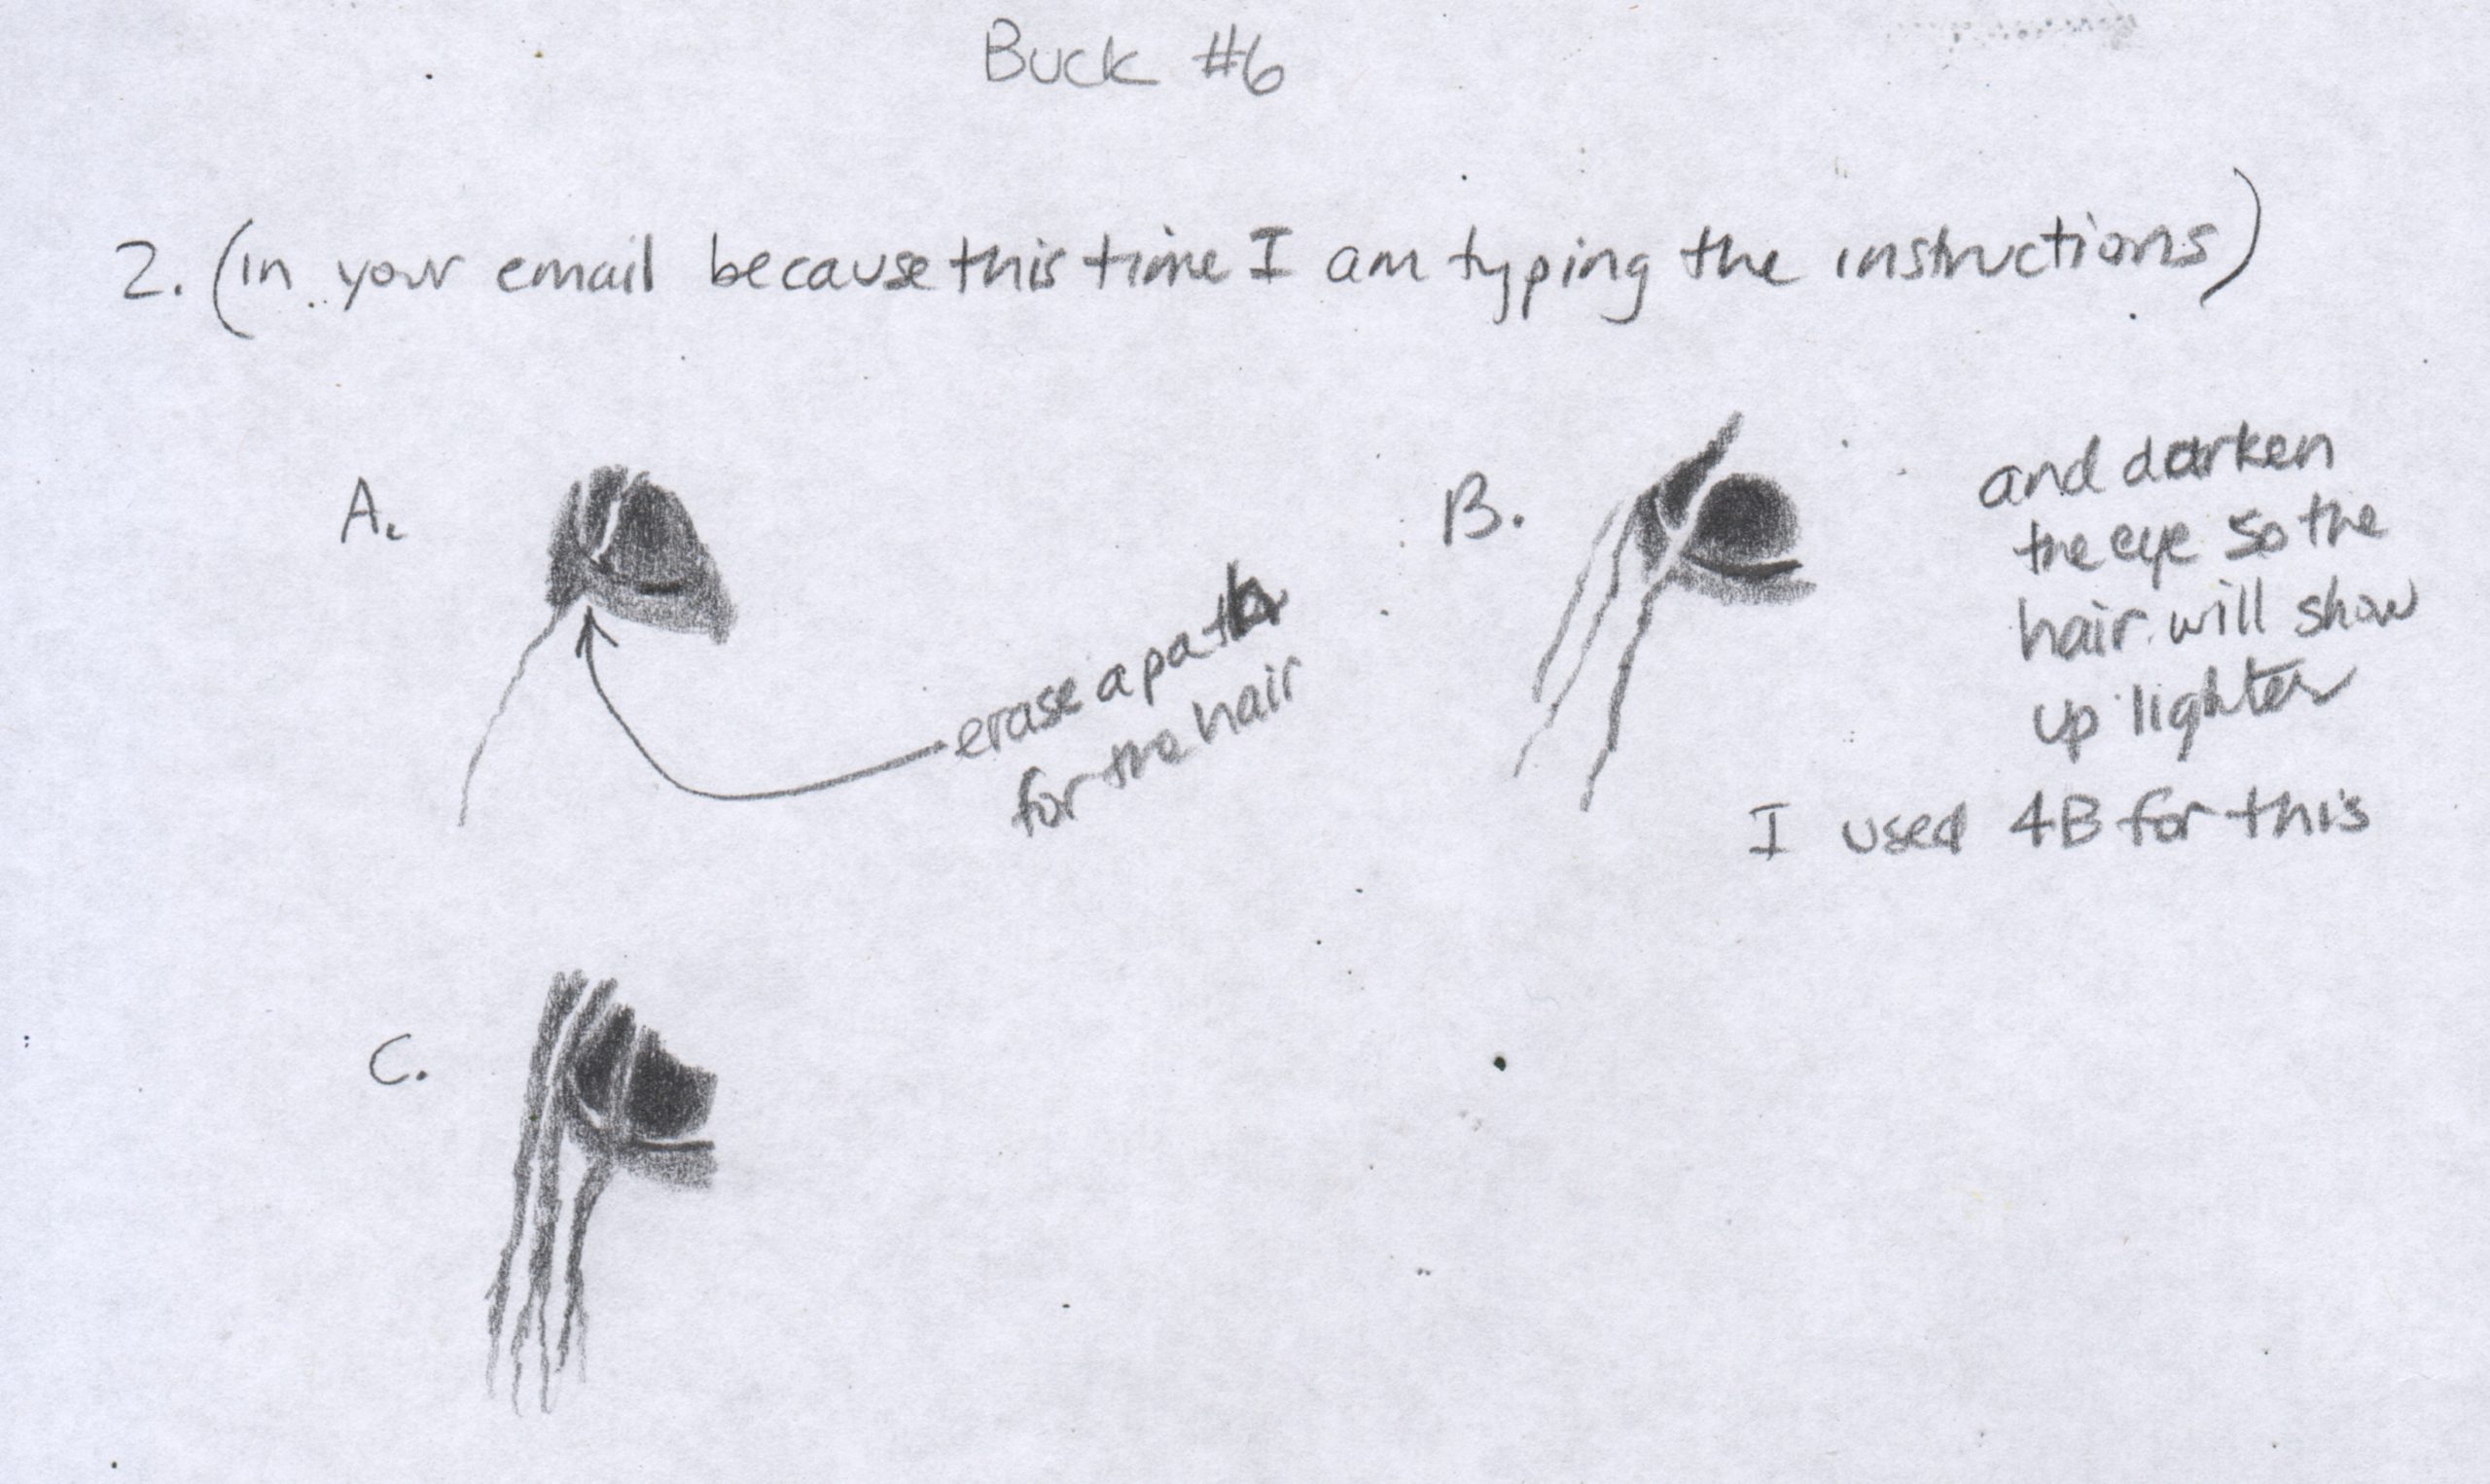
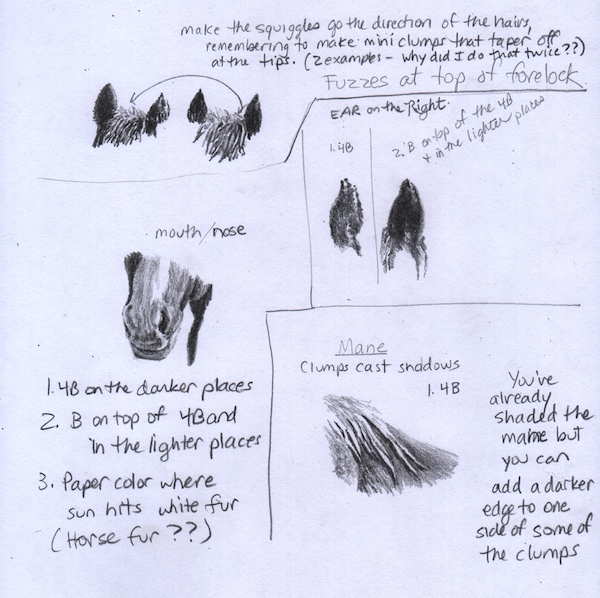
I need to find a way to encourage my students to be more independent so they don’t wait for me to tell them each step; at the same time, I understand why they wait for instruction, because who wants to erase?? 
C felt a little intimidated about being with people who are more advanced than she is.
It takes awhile for people to realize that their classmates are super encouraging and that all of us started at the beginning, not suddenly arrived as accomplished artists. I sometimes purposely bring something ugly and early to show my students so they won’t feel embarrassed by their own early origins. My students all make better first drawings than I drew AFTER I started accepting commissions. 
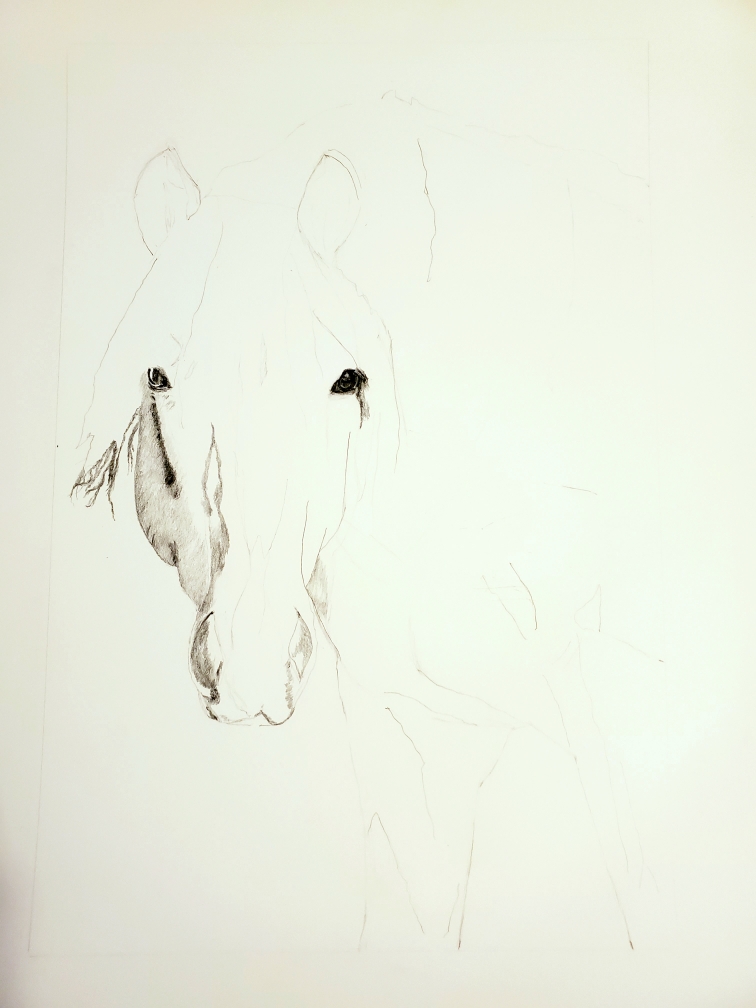
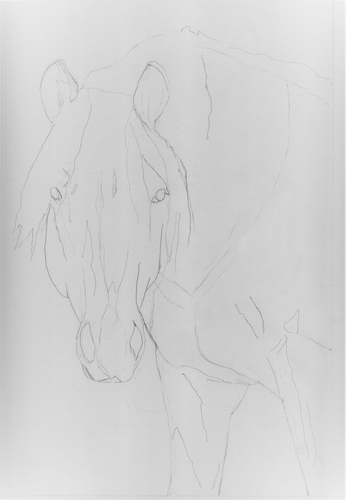
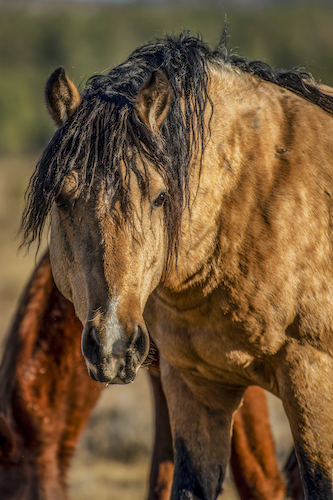
C had confidence drawing horses, a subject that she has painted several times.
She is right about having more confidence when drawing a familiar subject. I often remind my students to pick something they love, because they will be staring at it for L O N G time.
 
I love that my drawing students become friends, love listening to them all get to know each other, love learning from them on a variety of topics. Sometimes I wonder if it would be more efficient to ask everyone to stop talking and focus. Then I remember being in a colored pencil workshop when the very unpleasant instructor shouted, “QUIET! NO TALKING!” and I never want to do that. So, we’ll just keep on as things are, and I will continue looking for ways to encourage independence.

Virtual Drawing Lesson 4

C sent me her drawing with a list of 5 questions. This time I was more orderly, instead of making little patches of topics all over the paper. She only had one area that I needed to demonstrate, but I handwrote the entire sheet of instructions anyway. Then I realized that no one else would want to read all that scribbling.

Here is her drawing:

And here is a more concise list of instructions.

  1. There are a couple of scratches on the drawing. These can be fixed with a super sharp 2H or lighter pencil, working under a magnifying glass. (Yes, it is difficult – I can do this, and you may address me as “Dr. Pencil”.)
  2. Her decision to make the horse’s upper lip look more like reality than the photo was a good decision. (You may address me as “The Mayor of Realville”).
  3. She circled an area of the chest and said it didn’t look right to her. I told her it is because the strokes are too long, and I demonstrated those, scanned them, and emailed the scan. 
  4. When I spray-fix my drawings, I use Blair Matte Spray Fixative to keep my drawings from smearing. Beware: it alters the colors of some colored pencils (had a terrible spray fix accident once, still scarred), and I always try a little squirt first to make sure the nozzle isn’t clogged. 
  5. The best paper for my style of drawing is Strathmore (brand) Bristol (weight) Smooth (surface) 400 Series (quality).

I provide most of the paper to my drawing students in person. There are many things that are better about taking drawing lessons in person, but we are doing the best we can with this. I think C is doing a great job in communicating clearly, working on her own, and encouraging her reluctant instructor to push through her annoyance with technology.

Collaborative Drawing

A former drawing student lost her cabin in the Creek Fire this past summer. I asked her if I could draw it for her; she said yes and sent photos.

This former student participated in an art show a few years ago, along with 2 other advanced students and me. I asked those 2 others if they wanted to join me in drawing the cabin, and they both said yes. We all really like our friend and wanted to express our sympathy.

It took awhile to figure out what to draw, how to fit it together, who should draw which part, and even how to sign it. 

It took awhile, but we did it! Our friend was very touched, particularly by the fact that we each had a part.


Virtual Drawing Lesson 3

C really got on a roll and made great progress. Most of my students don’t work at home, and I continually remind them “no tests, no grades, no homework, no deadlines”. I should probably add “no guilt” because often they act as if they have done something wrong when they come to class without having done anything. But C is working very determinedly at home on her own, and it is most impressive.

This time I demonstrated the ear on the right (Rocky’s left ear), the nose/mouth (muzzle??), the fuzzes at the top of the forelock (“bangs”), and a bit of the mane to show that the clumps of hair actually cast shadows.

After she goes through these instructions, she’ll scan the drawing once more for a final analysis. This is about the 3rd or 4th drawing I’ve helped her with, and it is the quickest she has ever completed a drawing.

It is apparent that I could use a bit more planning and organization when I demonstrate and write the instructions. C and I are learning together how to engage in drawing lessons when not in person, and based on her progress with this drawing,I think it is a successful experiment.


Virtual Drawing Lesson 2

C sent me her drawing and a list of questions. Instead of circling new areas on the photo and addressing those, I will attempt to help her with her specific concerns. This is what I would have done if we were sitting together in class, before giving her new instructions.

Her list is in green below.

1. The dark line on the left side of his face is definitely too dark. Not sure why I left that, but I’m guessing I need to use my gum eraser and lighten that up. The white area that is above the eye looks much better on your example from last week, mine is too dark, but I’m not sure how to adjust that or if I need to. Your thoughts?

2. I erased the little swirl in the middle of his forehead because I realized it was not in the correct spot so I will add that back in this week.

3. I have some lines in the forelock that are a bit strange, from erasing, that I need to correct. Other than that, how do you think the forelock looks and what are your suggestions?

4. The mane. I attempted it and feel like it’s starting to look ok, but would it be possible to break the steps down a bit more on that for me? I feel like you gave me step 1 and step 4 but me being me,  I need steps 2 and  3 also.  Like here’s the squiggly lines (step 1), now here’s an example of the next step, and then the step after that to get to the clumps of dark and light (step 4). I hope that makes sense. 🙂

5. The very bottom of his chest on the left, that I have shaded in, looks a bit strange. The pencil strokes don’t look right. What would you suggest to correct that?

It was much harder this time, because I needed to show her by placing tissue over her drawing and drawing on top so she could see how to correct things. Instead, I had to rely on words.


It is pretty difficult to show steps this way because I have to draw step one, then draw it again and show step two on top and then draw steps one and two again with step three on top of that and then redraw one, two, and three before adding four.

Here are my notes in response. Time will tell whether or not this method of teaching is helpful to C.

Virtual Drawing Lesson

Figuring out a way to teach via computer seems like an important skill. I tried it earlier this year using Zoom, but hit a rough spot when it came time for me to demonstrate, or show my work, or see my students’ work, or lay a piece of tissue paper over their drawings to show them how to adjust proportions. 

Okay, that was more than “a rough spot”. It just didn’t work past a certain stage.

As long as I have been teaching people how to draw, I have been learning from my students. One of my students had a good idea of how to do this and was willing to try. Let’s call her C, because this is the World Wide Web and I protect the privacy of people. 

C scanned her drawing in progress and the photo she is using. I looked over her work, and just as if we were together, I circled various parts on her photo, and then showed her on another piece of paper how to proceed. This is her photo, so there is no copyright problem.

Before I show you her photo, drawing, and my instructions: if you are a bit of an art snob, before you get all bent about how “copying isn’t real art”, let me remind you that I am a drawing teacher. I help people learn how to put on paper what they really see, not what they think they see. This is the basis for good art. You have to learn how to see first.

Whooo-eee, that is some sloppy handwriting! I’m sorry, C, and will work harder to write more neatly next time. Plus, I made a writo – a typo in handwriting – “hit” instead of “hint”.

If we were together, I’d circle through the other students in the class, helping them in whatever way they needed, and then get back to C to learn if my suggestions were helpful to her, if she needed me to rephrase or clarify something, or if she was ready for more instruction.

This could be fun! 

P.S. Do horses have “bangs”?

Proud

Pride goes before a fall. God opposes the proud but gives grace to the humble. So why am I proud? and why is it okay??

I am proud of one of my drawing students!! (I don’t think this is a sin.)

Mae began taking lessons from me over 15 years ago because she was a watercolorist who wanted her work to be more realistic. She quickly graduated from pencil to colored pencil and tried 3 different brands before settling on Faber Castell Polychromos. She meticulously plans out each piece, experimenting with color combinations and working very methodically and slowly.

Meanwhile, Mae continued painting at home and with some friends at the Arts Visalia gallery. (This is the place where I have held drawing workshops, a very well-run non-profit gallery.)

During the ShutDown, Mae and another artist friend answered a Call for Artists from Arts Visalia. They have one big fund raiser each year, an orchid sale. This year, due to The Thing, the orchid sale isn’t happening. Instead, they asked their regular artists to do some orchid paintings.  Mae and Donna quickly responded.

The very day that Mae told me about her paintings, I came home to this flyer in my email inbox.

Mae’s painting on the left is “Three Scoops”. The one on the right is “Out of the Box”. Donna’s paintings are the center ones, equally beautiful, but I don’t know the titles.

OF COURSE I bought a package of these cards.

Will you? Click or tap the link below to Arts Visalia’s orchid sale.

www.artsvisalia.org/support-us/orchid-sale