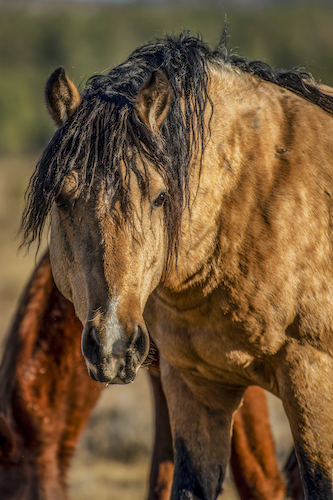
Look at this beautiful photo of a horse by my drawing student C. She wants to draw it and I will do my best to help her, through emails.

The first set of instructions was this:
- Trace the main parts to simplify the visual information
- Copy the tracing onto the drawing paper, rotating directions. Start upside down, then sideways, next other sideways, finally right side up. Each direction will show you different shapes and angles that need to be corrected.
- Trace a few more details onto the first tracing.
- Add those details to the drawing, remembering to rotate.
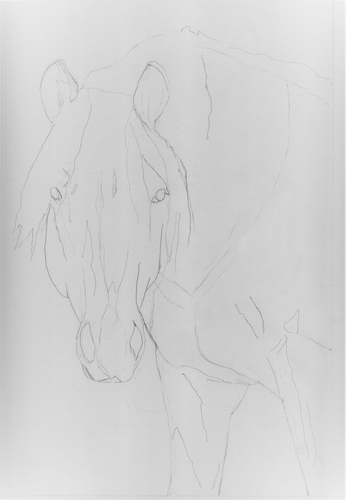
This is what C sent to me after finishing those actions.
She is drawing the same size as her printed photo. This means she can scoot the tracing over the top of her drawing to check her accuracy.
When students draw the exact same size as their photo, they can do this sort of checking. Here are some thoughts about that:
- Always force yourself to draw first, BEFORE laying the tracing on top. We all need to exercise our “seeing muscles”, and practice is the only way to learn to see accurately.
- When you draw the same size as your photo, you aren’t learning to see proportionately as quickly as if you draw larger or smaller. Sure, you will still have to see how things relate to one another inside the drawing, but you aren’t looking at the whole to learn to think thoughts such as “half is always half” or “a third on my drawing needs to be the same as a third on the photo”.
- When you draw the same size as your photo, sometimes you get paralyzed by the thought of changing size.
- If you are dependent on drawing the same size as your photo, it is even harder to transition into drawing from real life. Drawing from real life is the hardest way to draw, because you are going from 3 dimensions to 2 dimensions, and every time you slouch a bit or accidentally lean to one side or the other, the image in front of you changes.
Stay tuned. The virtual drawing lesson will continue.