How to draw with graphite and colored pencils, Ch. 1

My colored pencil artist friend Carrie Lewis asked me to write a tutorial, showing the steps of completing a drawing with pencil and colored pencil. 

I said, “How do I do that?” 

She offered to type while I talk through the steps, but I realized we’d have to be on the phone for about 8 hours. 

So, I chose a photo, started drawing, photographing the steps, and writing about it. Well, yes, sort of, sort of not.

The first session was confusing. I took notes, was sure I’d remember what they meant in order to transcribe them later. 

I photographed a few things, and also scanned the drawing as I went along, but then it was tricky to figure out which order all the pictures went in. Then, I realized there is a lot of information that doesn’t fall in line with the steps.

I’ve decided to post the whole tutorial here on my blog, in 5 chapters. Maybe we can tighten it up together.

How to draw with pencils (and later, add some color) 

The first four steps

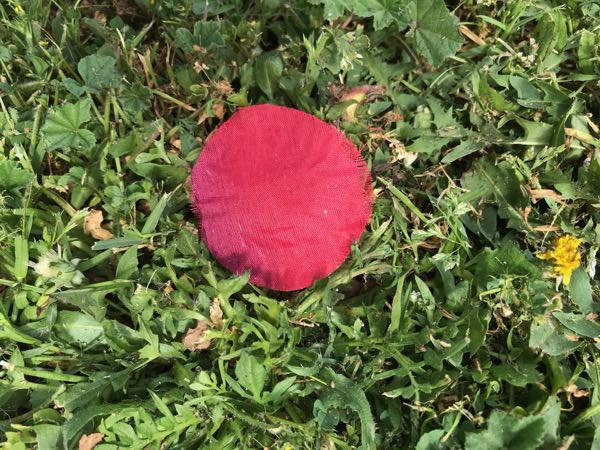
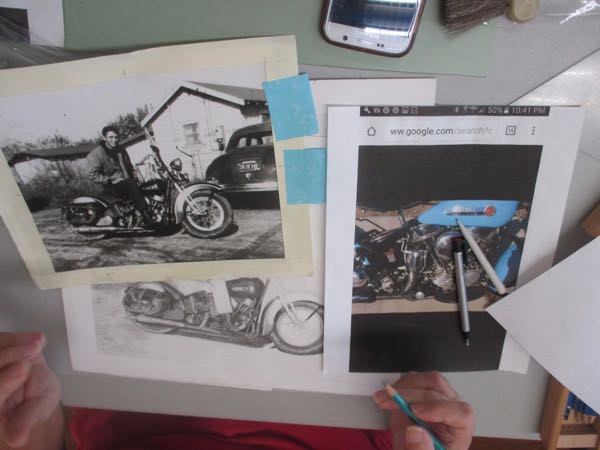
Step one: Choose your photo. I chose this because the red chair is a good candidate to be drawn in colored pencil, with everything else in graphite. You can just tint things at the end of a drawing or you can choose a specific item to do in full color. I prefer the latter method.

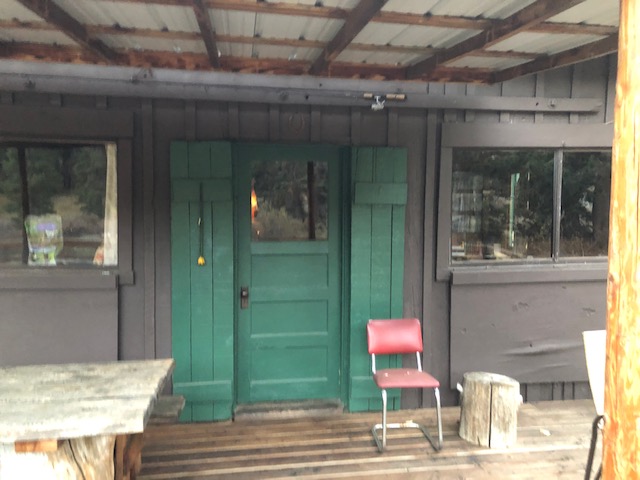
Step two: crop the photo. Beginners often feel chained to exactly what is in front of them. Over time and with experience, we learn what matters and what doesn’t, and eventually decide that we are the boss of our own artwork.

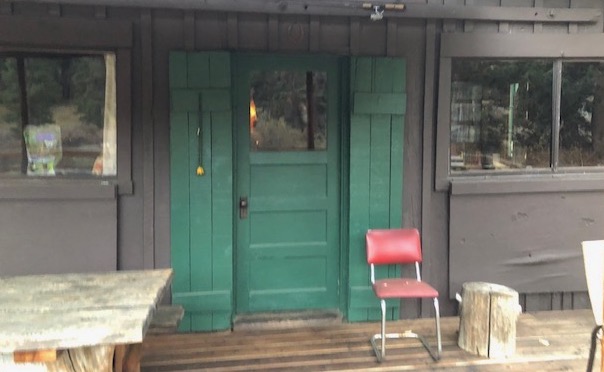
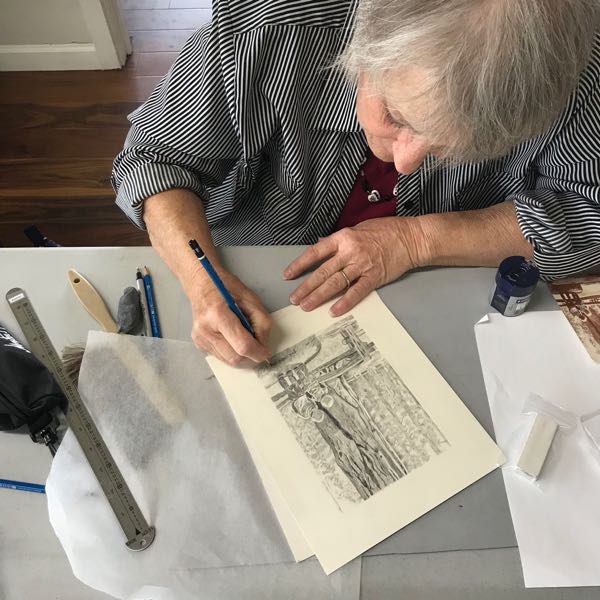
TOOLS: I use the items in the photo, working at a slanted drafting table. T-square, ruler (with picas so I don’t have to deal with fractions), drafting brush, erasing shield, calculator, pencil sharpener that catches its own crumbs, and Tombow pencils, from 4B to 2H, along with a couple of erasers that don’t show. I prefer the Mars white plastic, but seem to have lost mine. Because I began drawing so lightly, the kneadable eraser works, but it is too ugly to photograph. (It looks like gray chewed gum, gross.)

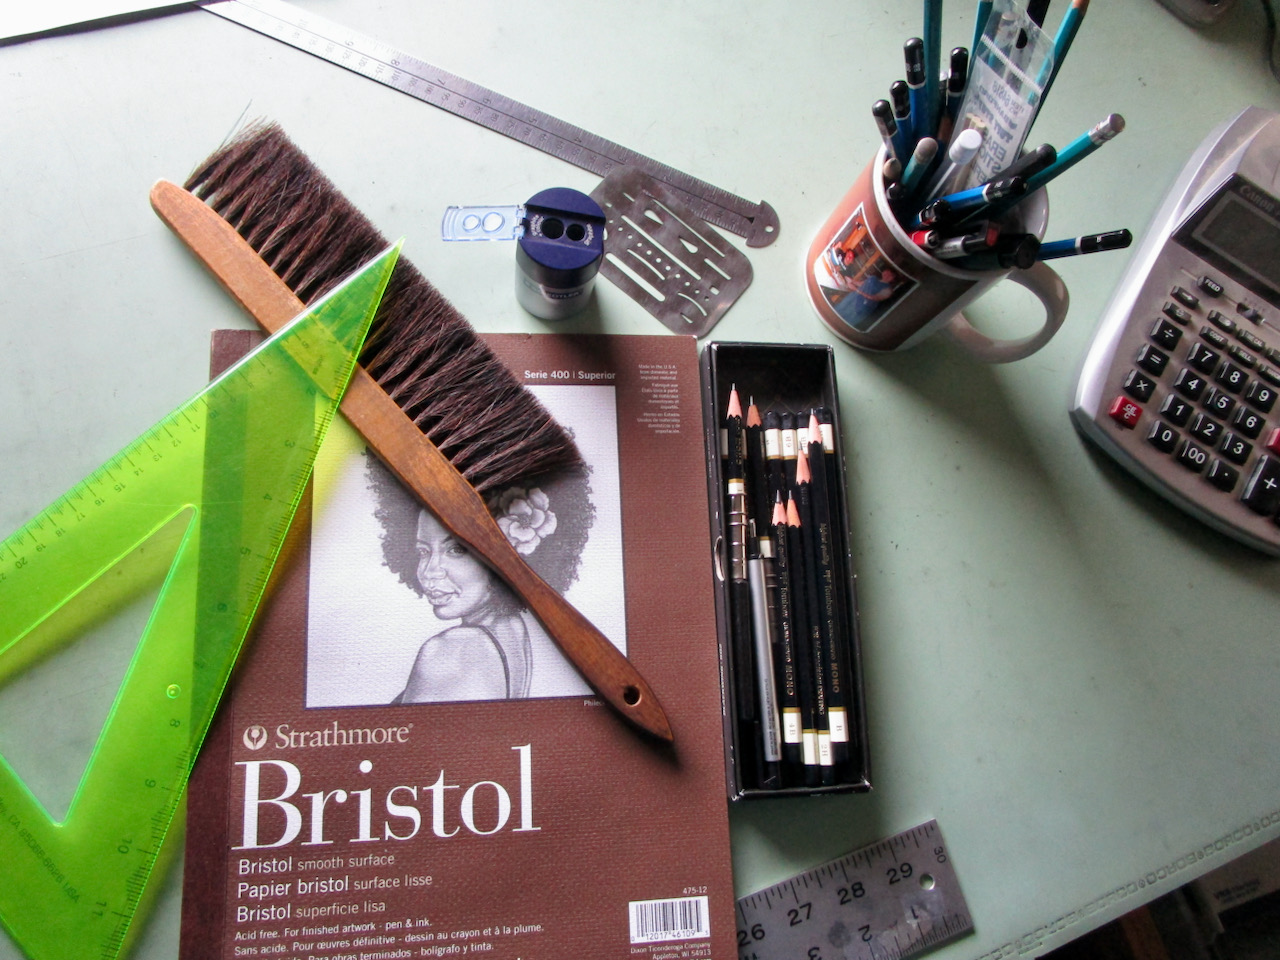
Step three: draw the borders, making a size that is proportional to the photo. Measure, use math, eyeball it—whatever works best for you. I measure and use tools. It is always best to have margins, so you don’t view the edge of your paper as the edge of your drawing. If you misjudge sizes while drawing, this will give your drawing room to grow. It also prevents a signing or framing problem, should you decide to get it framed. I draw the border with a sharp point on an HB, using a very light touch. I might want to move the border later, draw exactly up to it, or draw over it without it showing through.

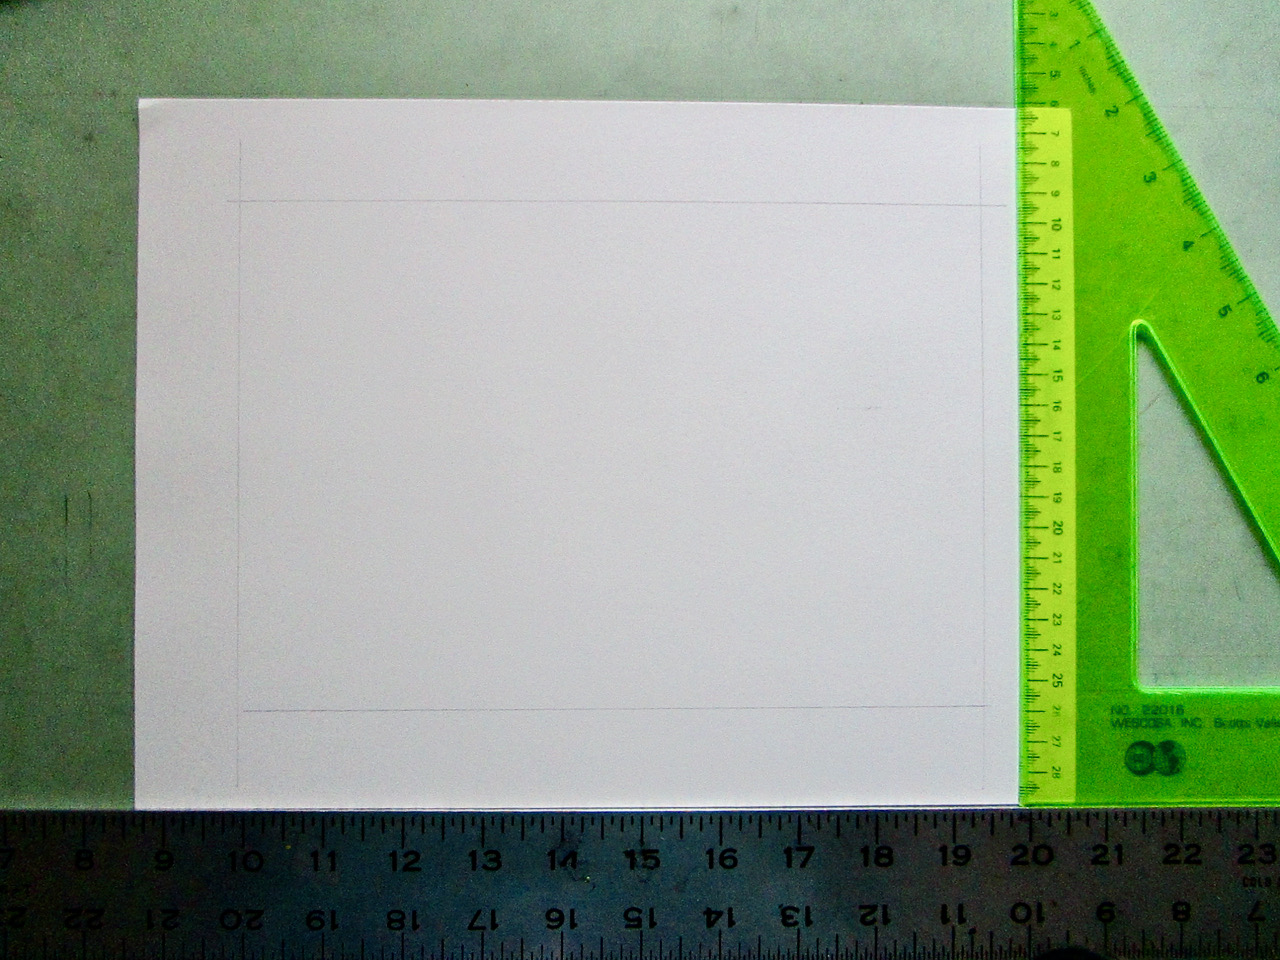
Step four: Start figuring out where things are going to go. Look for the main items, in this case, the door and the chair. Draw very very lightly. My lines barely show, so I darkened the lines (just on the photo using my scanner) in order for you to see them.

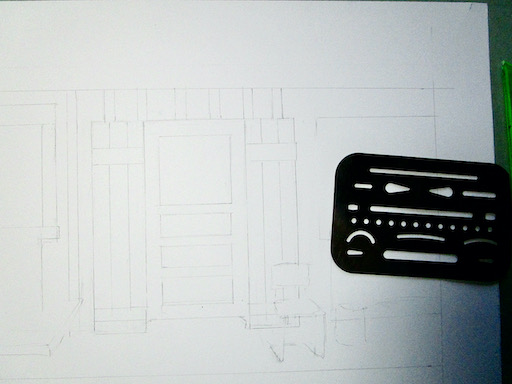
DISCLAIMER: I chose to alter the picture, to appear as if we are looking straight on the scene rather than from an angle. In most pictures, vertical is always vertical. It is the horizontal surfaces and lines and edges that disappear off toward vanishing points. However, I decided to keep the horizontals and verticals all true to a straight on view rather than slightly angled, as the photo shows. THIS IS REALLY HARD TO DO WHEN YOU ARE STARTING OUT, so you will have less trouble if you just stick to the photo.

Tomorrow: the next steps.

Another Emailed Drawing Lesson

Remember Buck, AKA Mr. Curly? C and I are continuing to work on him via email. She is a remarkably clear communicator, so this is working out well for us. She had specific questions, which always makes it easier to offer instructions.

This is how he looked when we last saw him. I sent her written instructions that corresponded to each colored oval.

This is the most recent iteration of Buck, complete with more colored ovals.

1. The upper neck/mane: You were right about this area. (She had circled it, said it looked wrong and asked about a particular fix.) If you study this area on the drawing versus the photo (I recommend upside down), you will see that the mane sort of curves downward into the neck. Hmmm, words aren’t working. Let me show you.
2. My blue circle: At the intersection of the leg and chest, that slight corner needs to be higher. Look at the photo to see EXACTLY where it lines up with the nostril. Essentially, you will be lengthening the leg by making that intersection a bit higher. Look at it all upside down to re-examine the shape between the face and chest. (A tiny thing that might not matter, but I am scratching around, looking for answers).
 
3. Red circle: study the photo to see where the nostril/cheek indentation and the neck intersect. (Another tiny thing that might not matter but try it just in case. . . )
 
4. Purple circle: All of this area needs to be much darker with the segments less defined because they are in shadow. The exception – keep this little bump light.
 
Does this all sound like gobbledygook to you? Good thing C and I have been working together for a couple of years, because it does make sense to her. 

Electronic Drawing Lesson with Buck

Remember my drawing student, C? She and I have been doing drawing lessons through email since last year. I haven’t updated you on her pencil drawing of a horse named Buck, whom I referred to for awhile as Mr. Curly.  I have been posting about other things, while C has been working diligently.

The last time I showed you:


The mane is looking great. She has now begun “undercoating”, just laying down pencil for a base coat while she waits for me to tell her something helpful. I actually had very little to say because she is doing a great job on her own.

This is what I told her:

1. Yellow: the cheek sticks out a bit too far. I noticed because his face seems noticeably curvy in your drawing. This made me check the photo, and when I put a box around the area on the drawing and one around it on the photo, I could see the drawing had a wider box. Just carve off a little of the cheek by widening the mane on the right side of the cheek. A fraction ought to do the trick.
 
2. Orange: blur the edge between the dark and the light of this area so it looks like something is changing color instead of being 2 separate pieces ofnthe face/nose.
 
3.  Green: Obviously you aren’t finished with this yet so this is just a heads-up to be sure to have the dark parts of the coat much darker than the bright-light parts. There is a ton of contrast in the photo, which is part of the appeal.
 
GOLD STAR FOR YOU!! 
 
Here is her original photo so you can see what I am referring to:

And if you would like to see the previous posts about virtual drawing lessons with C, here is the list. (Each link will open in a separate tab so you don’t lose this page.)

Previous Lessons

The beginning

Lesson 2

Mr. Curly Becomes Buck (lesson 3)

Lessons via email (lesson 4)

Soldiering on (lesson 5)

It is possible I missed a link to a post; it is more possible that I just didn’t keep you all current.

Soldiering on with Drawing Lessons via Email

C sent me this, requesting help with some specific areas.Oh how I wish we were together in person! But my o-so-wise dad taught me this: “If you put a wish in one hand and spit in the other, which hand actually contains something?” So we shall soldier on.

First, I did this:

Then I wrote up these notes:

P.S. It costs a fortune to have a transplant, and while insurance covers much, there is much more that it does not cover. If you feel generous and inclined to help my friend, Rachelle, this is the best way to do so: HelpHopeLive.Org

Drawing Buck

My drawing student C and I continue to work on her pencil drawing of the horse, Buck. This last time she took a photo of the drawing instead of scanning it. I tried to help and was able to show her how to put a lock of hair across the eye. She also asked me about her hair shading techniques, and after staring at it a bit, I finally concluded that it was all too squarified for me to tell what was pencil and what was pixel.

Here is what I told her in the email (because I think my writing is a little bit too sloppy):

“About the hair crossing over the eye: The question to be answered is always: Which is darker? sometimes the only way to tell is to squint at the photo so the detail and color blur. Another way is to turn your photo to black and white, but this sort of feels like cheating. Well, not cheating, but bypassing the ability to learn to see values by letting the computer do the work. Often the black and white method backfires, because the 2 things are the same value (darkness). This means you get to decide (you are the boss of your picture.)
 
“The hair is darker in some places and lighter in others. Just make the adjustments to whatever is behind the little clumps so that it shows up. It is okay for the clumps to look broken or disconnected.
 
“Hair always tapers at the tips.
 
“I can’t help you on the shading; because of the pixelation, it is too hard to tell what you have actually done and what is getting squarified. 8-( 
 
“You can either keep going and then scan it, or you can rescan this and I can keep going here!”
 
So, this lesson is on hold for a bit.
My show “Still Here” is still there, at Arts Visalia, that is. The phone # to make an appointment to see it is 559-739-0905. Gallery hours are Wednesday through Saturday, noon-5:30. The last day to see my work there is Friday, April 30.


Mr. Curly Becomes “Buck”

In the ongoing virtual drawing lessons, (actually happening via email rather than Zoom or video) the horse that my student C is drawing has a name, and it isn’t Mr. Curly; the name is Buck. This reminds me of a scene in a Chronicles of Narnia movie (one of the few movies I have seen or actually remember anything) of one of the kids riding a horse. He says to the horse, “Giddy-up, Horsie.” The horse turns his head back a bit and says in a very disgusted and dignified voice, “The name is Phillip.”

Please excuse the digression.

C sent me her drawing with the eyes completed. I circled one eye in red, then wrote up the notes demonstrating the next steps. I hope you can read my writing. But perhaps you don’t care, and only came to look at the photos.

Virtual Drawing Lesson 5

Virtual Drawing Student C finished her drawing of the horse, Rocky. She sent me a new photo that I named Mr. Curly, and I have instructed her how to begin.
About starting Mr. Curly:
1. First step is always to decide how big and where on your paper that Mr. Curly will go.
2. Remember to draw a border so that you don’t view the edge of the paper as the edge of your drawing. Margins are necessary for many reasons.
3. Do you have tissue paper so you can trace the main shapes? The purpose of this is to simplify the image in order to get the bare bones laid out on your new paper.
4. If you don’t have tissue paper, you can skip that step. It is a little harder to see the main shapes with all those colors and textures than if you are looking at just an outline on tissue.
5. Remember to look at the drawing (and the tracing or the photo) upside down, sideways, other sideways, and then finally right side up. 
6. Go slowly, draw light, and don’t stop until all the shapes look perfect. Okay, you can stop if you need a break or feel stuck, but don’t begin shading until you have all the outlines down. Remember to draw the dog before you draw the fleas.
7. After it looks perfect, scan and send it to me so I can see if there are any problems with the proportions.
 
P.S. Maybe Mr. Shaggy or just Shaggy would be a more appropriate name. Or how about Lurch?

Virtual Drawing Lesson 3

C really got on a roll and made great progress. Most of my students don’t work at home, and I continually remind them “no tests, no grades, no homework, no deadlines”. I should probably add “no guilt” because often they act as if they have done something wrong when they come to class without having done anything. But C is working very determinedly at home on her own, and it is most impressive.

This time I demonstrated the ear on the right (Rocky’s left ear), the nose/mouth (muzzle??), the fuzzes at the top of the forelock (“bangs”), and a bit of the mane to show that the clumps of hair actually cast shadows.

After she goes through these instructions, she’ll scan the drawing once more for a final analysis. This is about the 3rd or 4th drawing I’ve helped her with, and it is the quickest she has ever completed a drawing.

It is apparent that I could use a bit more planning and organization when I demonstrate and write the instructions. C and I are learning together how to engage in drawing lessons when not in person, and based on her progress with this drawing,I think it is a successful experiment.


Short Mural Break

Two workdays per week are already scheduled to the point that working on the mural at Mooney Grove cannot happen.

One of those days involved taking a walk around a park in Exeter. It was a little bit boring (I am ruined by Mooney Grove for big empty-ish grassy lots masquerading as parks). To keep my interest, I listened to a fabulous interview on Donald Miller’s Storybrand podcast.

I also photographed wildflowers in the lawn, along with other items (non-volunteer) of natural color. These are weeds within a lawn but it doesn’t really matter. They get watered and mowed, and they add green to the landscape. This appears to be a squirrel and gopher-free park, so the grass is quite well-maintained.

First, the “weeds”:

Now, the planted colors:

And one weird little imposter: I thought this might be an aberrant red leaf even though there were several. When I enlarged the photo, I saw it is a piece of woven fabric, such as a petal to a silk rose. Ha ha, fooled me. A peculiar sight indeed!

Later that day during drawing lessons, we had an event worth sharing: a student finished a drawing and signed it! Way to go, Jane!

Drawing Lessons Begin

Drawing lessons are suspended during the hot months of July and August, but they resume the day after Labor Day in the hot month of September. Therefore, today, let the lessons begin again!

I’ve been helping people learn to draw since 1994, and in the process I’ve learned to draw better myself. Even more important, I’ve gotten to know fabulous people, many of whom I consider friends and are still in touch with.

On paper, my classes are almost full. There is a spot or two from 3:30-4:30; all the regulars in that hour are high school students, so their schedules and their desires change pretty regularly.

If you would like drawing lessons, let me know via the contact thing on my site, or in the comments, or by email, or even a phone message to 559-561-7606.

Lessons are $55/month.

Clearly this girl has an interest in marine life! We are both a bit stumped on how to portray the water, but we’ll figure it out.

Everyone works from her own photo (guys are allowed too, but for some reason I don’t have any photos of them) at her own pace.

“Pick something you love, because you’ll be staring at it for a loooonnnngggg time.” – Jana Botkin