What we think we see

When we are beginning to make art, we depend on symbols more than visual information. The symbols come from our memory, from what we know. The visual information comes from what is in front of our eyes, regardless of what we know. You may know that a table has a round top, but what your eyes are telling you is that it looks like an oval. How can this be?? What do I trust? It takes a leap of faith to ignore what is in your mind and draw what is in front of your eyes. The first time someone tries this and it looks “real! it looks like a photo! I can draw!”, it is a thrill!

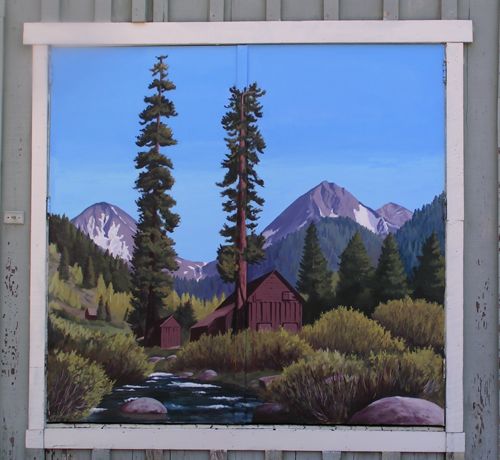
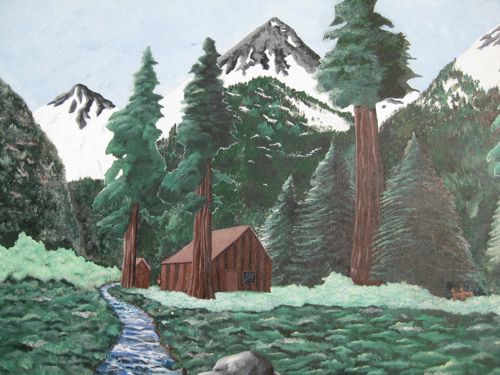
At the risk of annoying or offending (always a risk – why are folks so spring-loaded these days??), I want you to see a mural in downtown Visalia. I don’t know who painted it and I don’t know their instructions. I also don’t know their intentions. What I do know is it appears to sort of be Farewell Gap, sort of, maybe, kind of. This is an example of someone looking at a photo and painting from symbols in their heads. Those of you who are spring-loaded in the defensive position may be thinking that the artist(s) were being creative, not bound to the photo, and simply expressing themselves with a derivative work, using the photo for reference, et cetera. That’s fine, but I am trying to show examples here, and this fits, so just take a deep breath and try to follow along.

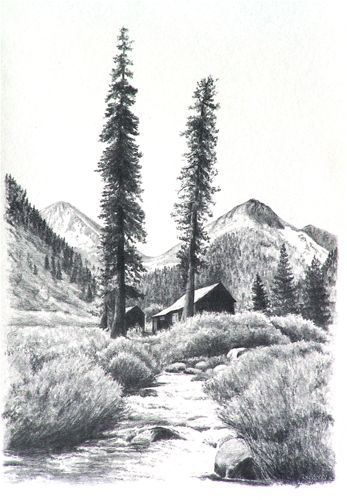
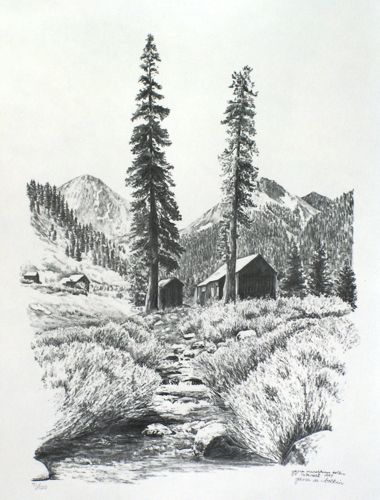
For comparison, here again is the photograph of Farewell Gap:

Three ways of interpreting

This will be a four parter, and thank you to Bill T. a workshop participant for the idea!

There are 3 ways of seeing when one is making 2 dimensional art. “Interpreting” might be a more accurate term here.

1. What we think we see – When we are children, or when we are untrained adults, we tend to put on paper what we think we see. For example, it is a table, we know it is a table, it has a rectangle and 4 sticks for legs, what is the problem?? The problem is the lack of realism, depth, perspective, proportion and believability. This isn’t a problem if you are 5 years old, but when you begin to understand more of life, it is highly discouraging to realize that your drawing isn’t as great as your Grandma thought.

2. What we really see – As we learn what is really in front of us visually, our work becomes more realistic. We can see distance, and things make sense. One of the tools for achieving this type of accuracy is the simple step of working upside down. No, I don’t mean standing on your head – this doesn’t work for plein air! Turn both your photo and your drawing upside down and the result will first be confusion. Then, your brain will shift into its right-seeing mode (right in both senses of the word), and your shapes will become proportioned correctly.

3. What we wish we could see – One day, we realize that real life isn’t all that grand to look at. Wouldn’t it all look better if we could just edit out the telephone lines, the power poles, the scruffy branches and the garbage cans? In fact, what if we could scoot that mountain over a bit (even without the faith of a mustard seed!) and perhaps reroute that stream? As our skills and confidence grow, we realize we can! “I’m fifty-one and I can do whatever I want! Besides, it’s MY picture!” This obviously has a few shortcomings – there are times when reality has to be recorded, but it is good to recognize the times that we as artists get to do our own arranging.

In conclusion to this introductory explanation, have a look at this photo of Farewell Gap. It will be the basis for illustrating the 3 ways of interpreting what we see.

Demonstration and Workshop

On February 25 and 26, I will be giving a demonstration and workshop in Porterville for their very active art association. There is still space if you’d like to register. The cost is $30 for members of the P’ville Art Assn. and $35 for non-members. I may have mentioned a time or two that I love to draw, and pencil drawing will be the subject of the events.

Everyone likes a freebie – door prize, raffle prize, pick-a-prize, silent auction, live auction, buy-one-get-one-free. (I like free stuff too, particularly consumables, specifically dark chocolate.) This is what I am donating to the Porterville Art Association – not sure how they will turn it into a freebie. Guess we will all have to attend!

First Things First

Second in a series called “Thoughtful Thursdays”

Living in a beautiful place often inspires people to create art. Lots of people get the yen to paint, often when retired. (Sometimes I have to bite my tongue to keep from saying, “Oh yeah? I think I’ll try practicing law when I retire!”) Most don’t understand that drawing comes before painting, sort of like grunting and pointing comes before public speaking.

A painting without drawing skills behind it is usually a weak piece of art. By “weak”,  I mean weird shapes, bizarre perspective, and lacking in contrast. Unless one can see proportions, perspective and understand values  and composition, the resulting paintings will most likely be exercises in frustration. Throw in color, paint consistency and brush behavior, and you get a recipe for visual chaos. (Of course, if one is more process than product oriented, poor paintings may not be considered a problem.)

Drawing is a skill that can be taught, learned, and developed through repetitious practice. I have been teaching people how to draw for 17 years and always tell beginning students “drawing is a skill, not a talent”. It is like typing – everyone can learn to type. Some type 25 words per minute, and others hit 90. Those speedsters are the ones with talent, but all are typists.

Despite knowing the proper sequence of skills, I do understand the desire to just dive in! When I was learning to knit, my attitude was “Scarves? We don’t need no stinkin’ scarves!!” My first project was a sweater, and not just a simple pullover but a cardigan, complete with button bands and button holes! Needless to say, I own many weird sweaters, and, after almost 6 years of knitting, quite a few good ones too. So, it is probably possible learn to paint without first drawing, if one is learning from mistakes in the process rather than just cementing bad practices. Of course one must also be willing to have a collection of weird paintings!

Musicians, particularly pianists, have to practice like crazy. They play lots and lots of scales, repetitious exercises, picking apart songs line by line, phrase by phrase, note by note. Artists sometimes forget to practice and treat each new piece as if it were the performance of a lifetime, or thinking in athletic terms, an Olympic event. Practice, practice, practice. This is how you learn to draw and to cement those skills of proportion, perspective, value and composition.

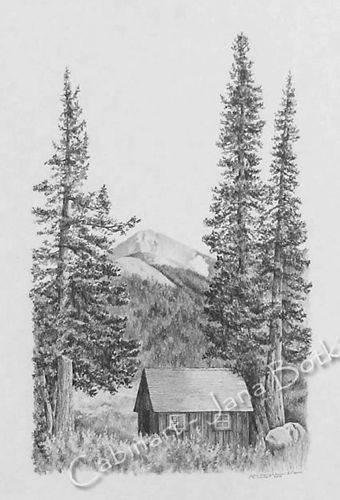
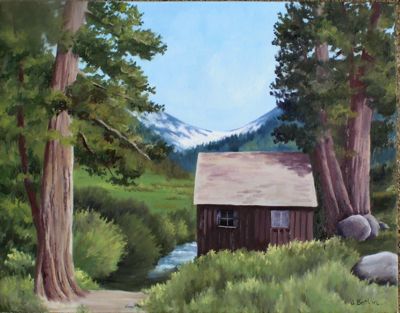
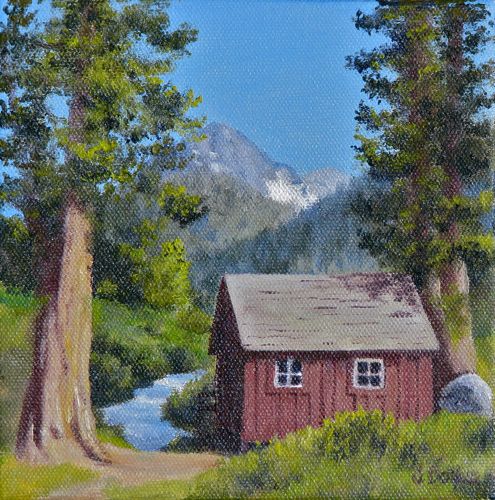
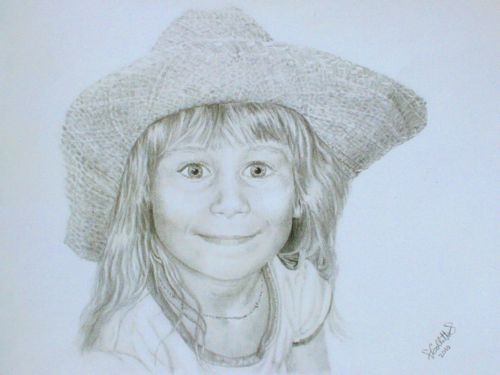
The drawing above was done when I was competent in my drawing skills. This painting was my first attempt at the same subject  when I was brand new to oils (try to be polite!):

Here it is again after 3 years of practice with oils (and I’m sure it will look hideous to me in another 3 years!):

It is all speckled because I photographed it wet in bright sunlight and the sun reflected off the texture of the canvas. Photography is another skill that requires training and practice!

Learning to draw, Chapter Twenty-One

I have a drawing student who has been very diligently working at her skills for perhaps 10 years. When we first met, my classes were full and the waiting list had 70 or 80 names on it. Her desire to learn was so strong that she asked me to recommend a book to her. As always, Betty Edwards’ Drawing on the Right Side of the Brain was my only and best idea. She bought it, worked through the exercises, and when space in my classes became available, it was apparent she really didn’t need drawing lessons from me! She disagrees with that analysis, but have a look at her work:

susies-girl.jpg

Today’s drawing tip is this: practice, practice, practice!

Learning to draw, Chapter Nineteen

char.jpg


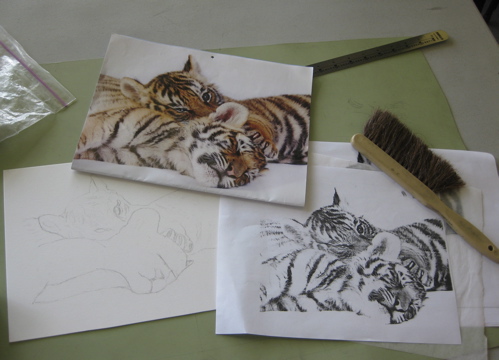
A black and white copy helps see the values; a color photo has better detail.  The order of difficulty in drawing from easiest to hardest is this:  1. other people’s drawings 2. black and white photos 3. color photos 4. real life. When using other people’s drawings, all the decisions about texture and value have been made. A black and white photo has all the value decisions right there for you. A color photo requires decisions about texture and value, but it is still a 2-dimensional image. Real life won’t hold still, doesn’t have any boundaries, is full color and changes each time you slouch a little lower!

Learning to draw, Chapter Eighteen

lynne.jpg

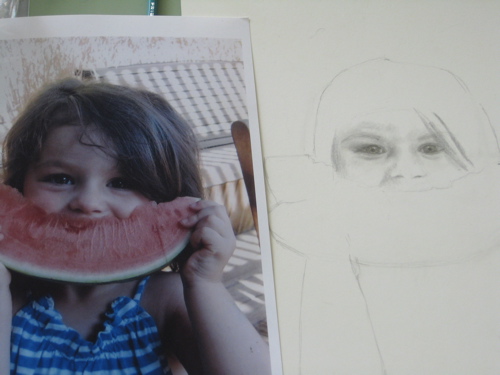
When drawing a portrait, the most important part is the eyes. If the person isn’t recognizable from the eyes, there is more work to be done. John Singer Sargent was probably the best portrait artist from the USA (turn of the last century). He said “A portrait is a painting with something wrong with the mouth”.  Apparently, one can have the mouth a little bit off, but my experience is that the eyes must be accurate. Then, if your subject is eating watermelon, the rest is a cake walk! (sorry – i think it is dinnertime at the time of this writing)

Learning to draw, Chapter Seventeen

ricky.jpg


Ricky is new to drawing lessons, but not to drawing. He listens very carefully and then follows instructions as if he has been waiting for this information his entire life. I can teach anyone who can listen! It usually takes about 3 months of lessons (one hour a week) for the new student to start “getting it”.  The only people who don’t learn to draw from me were the ones who quit too soon.

Learning to draw, Chapter Sixteen

tools.jpg

If you have been following my blog entries on Learning to Draw, you may have noticed a few tools in the photos. When I was a student of architectural drafting, I discovered 2 indispensable tools – a drafting brush and an erasing shield. When you erase, crumbs are created. (duh!) If you brush them away with your hand, you WILL smear the drawing. If you blow, you might spit. (As we say in Drawing Lessons, “Spit happens!”) Only has to happen once to your drawing to teach you an unforgettable lesson about using the drafting brush.  The erasing shield looks like a tiny thin metal template. It is, sort of, but instead of tracing the shapes, it allows you to isolate the parts that you don’t want and erase them. When the corners are worn off of your eraser, the erasing shield prevents wiping out large areas by accident. Tools – we all need them!  p.s. See a corner of the triangle? OF COURSE I use a straight edge! How else can I draw perfectly straight lines??  Cheating? Not!

Learning to draw, Chapter Fifteen

olivia.jpg

Ever think about drawing a bird’s nest? Olivia found a nest full of eggs and took multiple photos. Did you know that blue jays lay bluish-green eggs? I learn so much from my students! Her plan is graphite on the nest and colored pencil on the eggs. When drawing a complicated and repetitive subject, block out all but the section on which you are working. Post-it notes are perfect for this.